X1C Standard Operating Procedure
This SOP covers the Bambu Lab X1 Carbon (X1C) with AMS 2 Pro. Steps come from the official Bambu Lab wiki and AMS 2 Pro store specs. If you have not used this printer before, contact Ryan Kuederle.
Pre-Start Checklist
- If this is your first time on this machine, you have contacted Ryan Kuederle.
- Long hair, loose clothing, and jewelry are kept away from the printer.
- The magnetic build plate is seated on the heatbed, not crooked, and does not contact the excess chute, Z-slider stopper, or inner liner (plate placement).
- Filament in the AMS 2 Pro (or on the external spool holder) matches the filament type and color in the slice. Official Bambu spools are identified by RFID; third-party spools must be set on the screen or in Bambu Studio.
- AMS 2 Pro slots you intend to use are loaded, and mapping will be confirmed before the job starts.
- Front glass door position matches the filament: keep the door closed for ABS so the chamber stays stable; for PLA, TPU, or PETG the wiki recommends a partially open door to reduce heat creep (door sensor).
- You will not touch the hotend or heatbed. They get hot enough to burn; the clog wiki requires heat-insulation gloves if you must work near a heated nozzle.
Bambu Studio prep
Download Bambu Studio. Official system requirements include Windows 10 or higher, macOS 10.15 or higher, or Linux from GitHub releases.
First-run wizard (from the Studio quick start):
- Select the login region that matches the Bambu account (a North America account will not work if the region is set to China).
- Select the Bambu Lab X1 Carbon printer preset and the nozzle size in use (the included nozzle is 0.4 mm hardened steel).
- Select the filament presets you will use.
- Install the Bambu Network plug-in if you will send jobs over WAN/LAN. Studio and the printer must be on the same LAN to send files over the local network.
For each job:
- New Project, then add a model (
.3mf,.stl,.stp,.step,.amf,.obj). - Choose the X1C printer/nozzle preset, a filament preset that matches what is loaded, and a process (0.20 mm layer height is the typical default in the wiki).
- Click Slice plate.
- Click Print / Send only after the machine is connected (see network section below) and AMS mapping looks correct.
Bambu Studio will auto-map project filaments to AMS slots by type and closest color. Confirm the mapping popup before sending. A slot showing ? is a third-party spool whose type/color was not configured — only select it if the physical filament matches the slice (multi-color printing).
You cannot edit AMS filament information during a print.
AMS 2 Pro load / unload
Official load steps: Install AMS 2 Pro on X1C. Compatibility: AMS 2 Pro specs.
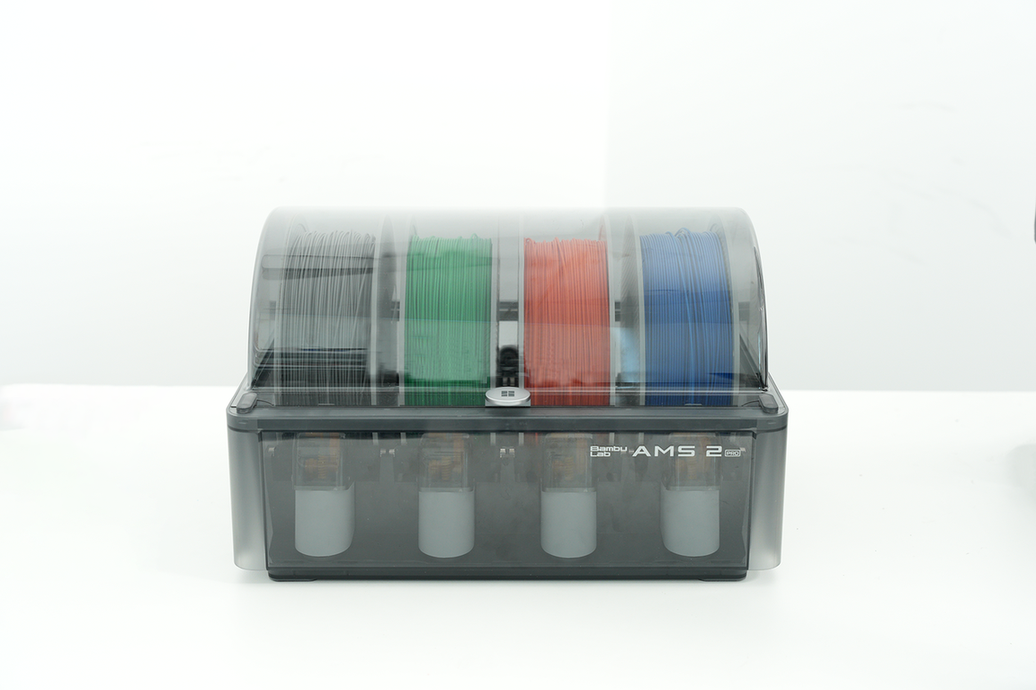
Load (from the X1C install wiki)
- Lift the AMS 2 Pro top cover and place the spool in a slot.
- Gently push the grey feeder tab and insert the filament about 2 cm. The AMS 2 Pro detects the filament and begins to pull it.
- Official Bambu spools are identified by RFID (type and color). RFID values cannot be edited.
- For unofficial / third-party spools, tap the slot and set type and color on the screen, or configure them in Bambu Studio.
- To feed into the extruder, tap the slot on the screen and tap Load.
Do not edit filament information during a print.
Unload
- On the screen, tap Unload so the printer returns filament from the extruder to the AMS 2 Pro.
- Push the grey feeder tab and pull the filament out by hand if you are removing the spool.
Do not put these in AMS 2 Pro (from store specs):
- TPE, generic TPU, PVA (damp), BVOH (damp), Bambu PET-CF / TPU 95A, and other carbon-fiber or glass-fiber filament.
- The X1C printer itself lists TPU as supported; print generic TPU from the external spool holder instead (switch AMS to spool holder). TPU for AMS is listed as AMS 2 Pro-supported.
- Spools outside 50–68 mm width and 197–202 mm diameter. Filament diameter is 1.75 mm.
Supported in AMS 2 Pro (store specs) includes PLA, PETG, ABS, ASA, PET, PA, PC, PVA (dried), BVOH (dried), PP, POM, HIPS, Bambu PLA-CF / PAHT-CF / PETG-CF / Support for PLA/PETG, and TPU for AMS.
If the AMS 2 Pro is not already connected, stop and contact Ryan. Connecting it to the X1C uses a filament buffer, PTFE tubes, and 4-pin / 6-pin Bambu Bus cables (install wiki, connection guide). Users should not rewire the unit. If it is disconnected, contact Ryan.
AMS 2 Pro drying
Official X1C drying steps: Use drying from the X1C screen, AMS 2 Pro drying function, drying on X1/P1.
The X1C cannot power AMS 2 Pro drying. An official Bambu Lab Switching Adapter (24 V 4 A) is required. On the Drying and Humidity page the power icon should be green. If the power icon is not green, ask Ryan — do not substitute a third-party adapter (that can damage the unit and is not covered by Bambu’s warranty).
Printer firmware must support AMS 2 Pro drying. Without the firmware that enables this feature, drying will not work (X1 firmware update for AMS 2 Pro / AMS HT).
You cannot dry while filament is loaded. Unload first (select each loaded slot and tap Unload). The wiki will prompt you to remove loaded filament if you try to start drying with it in the path.
- Place spools in the slots and close the top cover for an airtight seal.
- On the X1C touchscreen, go to Filament and tap the AMS humidity icon to open Drying and Humidity. Alternatively: Settings (bottom right) → AMS Drying.
- Select the slot(s) to dry.
- Official Bambu RFID spools auto-set drying temperature and time. For manual settings, the maximum is 65 °C. The X1/P1 drying wiki gives PLA as an example: 45–55 °C, 6–8 hours.
- Tap Start. Keep the bottom and rear vents unblocked.
When drying higher-temperature materials such as ABS or PETG, remove PLA and TPU first. Those drying temperatures can exceed PLA/TPU softening temperature and the filament can deform (drying-function wiki). When drying PLA, other filaments may remain in the AMS.
Maximum drying temperature is 65 °C (and only reachable when ambient temperature is above 25 °C, per store specs). Some engineering filaments need temperatures above 65 °C — the wiki recommends AMS HT for those.
After drying finishes, allow the filament to cool before handling. Then insert and Load if you will print.
Start a print (Studio, SD card, or touchscreen)
Before any start method: plate seated, filament matches the slice, AMS mapping confirmed, door set for the material.
From Bambu Studio (print from Studio, Studio quick start):
- Slice, then click Print.
- Select this X1C, review calibration options (bed leveling, flow / Micro Lidar, etc.), and confirm AMS mapping.
- Click Send. If Studio can see the printer on the local network and a microSD card is in the slot on the right of the touchscreen, the file can go to the printer directly; otherwise it may go through Bambu cloud unless LAN Only is on.
- Monitor from Studio’s Device tab.
LAN / Wi-Fi (official steps only). Ask Ryan before joining a shop network.
On the printer (network guide):
- Open Settings → Wi-Fi.
- Choose the approved network, enter the password, tap Join.
- Wait for the connected confirmation.
Bind Studio or Bambu Handy using the same Bambu account, or use LAN Only:
- Bambu Handy: Devices tab → + Bind Printer, then sign into the same account in Studio (Studio quick start).
- LAN Only (X series): Settings → LAN Only, turn it on, then in Studio’s Device list select the printer (lock icon) and enter the access code. For printers not on the same subnet, bind with IP address + access code (LAN mode).
- On X1, sending a job in LAN mode requires a microSD card in the slot on the right of the screen.
PIN-code binding in Studio is documented for P and A series only, not X1C.
From microSD / touchscreen:
- In Studio, use Export plate sliced file (or Send to the printer SD card while on the same LAN).
- Insert the card in the slot on the right of the display.
- Home → Print Files → SD Card, select the file (Studio quick start).
- For multi-color files, confirm or edit AMS slot mapping on screen. A slot whose AMS type does not match the slice cannot be selected.
Built-in example files: folder icon on the home screen, pick a model, enable calibration options, tap Print Now. Multi-color built-in models need matching colors loaded in the AMS (first print).
The top-left button wakes the screen; the second top button stops a print (FAQ).
After the print
- Wait for the nozzle and heatbed to cool enough to handle. Do not touch them while hot.
- Remove the flexible steel build plate from the magnetic heatbed. Avoid handling the print surface with bare hands — oils reduce adhesion (PEI cleaning).
- Flex the plate to release the part (build plates). A Bambu scraper is included in the accessory box; print the scraper grip from the built-in files if needed (accessories).
- If filament is still in the extruder, Unload on the screen so it returns to the AMS 2 Pro, then pull it from the feeder if you are swapping spools.
- If adhesion was poor, wash a textured PEI plate with warm water and dishwashing detergent (no oils/moisturizers). Do not use acetone on textured PEI.
- Confirm a container is under the rear purge chute so purged filament is not left on the bench (unboxing combo).
AMS 2 Pro notes
- AMS 2 Pro has four slots. Each feeder inlet has ceramic-reinforced anti-wear bushings (intro and connection guide).
- Two drying modules, maximum 65 °C. RFID reads official Bambu spool tags. Sealed storage plus temperature and humidity display on the printer screen, Bambu Studio, and Bambu Handy.
- Connecting AMS 2 Pro to the X1C uses a filament buffer, PTFE tubes, and 4-pin / 6-pin Bambu Bus cables (install wiki). Users should not rewire. If it is disconnected, contact Ryan.
- Drying on X1C requires the official Switching Adapter; the power icon on Drying and Humidity should be green. If it is not, ask Ryan.
- Factory desiccant is color-changing (yellow → purple when saturated). When it turns purple it needs replacement or drying — contact Ryan; do not service the unit yourself (intro and connection guide, basic maintenance).
- PTFE tubes are consumables. Feeding failures can mean worn tubes — do not replace them yourself; contact Ryan.
- RFID also supports remaining-filament estimation and auto filament backup on official Bambu spools.
Troubleshooting
Only issues documented on the official wiki. For anything mechanical (hotend removal, AMS hub teardown, cable reseating), contact Ryan — do not disassemble the machine.
- Build plate warning (HMS 0300-0D00-0001-0003): reseat the plate so it is fully on the magnets and not touching the excess chute, left Z stopper, or rear liner; clear debris from the chamber floor and Z sliders (wiki).
- Wi-Fi will not join: weak signal, 2.4 GHz interference, or a damaged antenna. Do not open the printer; contact Ryan (network guide).
- Printer on Wi-Fi but Studio/Handy will not bind: printer isolated from the PC (common on guest networks), cloud unreachable, or a PC firewall/VPN blocking the connection. Ask Ryan before changing shop network settings.
- AMS 2 Pro not recognized: check that you have not unplugged cables; if it is disconnected, contact Ryan rather than reseating 4-pin / 6-pin bus cables yourself (install wiki).
- Drying will not start / power icon is not green: X1C cannot power drying. Official Switching Adapter required; firmware must support AMS 2 Pro drying. If the icon is not green, ask Ryan.
- Drying blocked because filament is loaded: unload first, then start drying.
- Nothing extrudes: confirm a clog with a small extrude from the screen at print temperature. The wiki then distinguishes hotend vs extruder clogs and says to disconnect AMS first. Stop and contact Ryan rather than removing the hotend (which part is clogged).
- Door sensor alerts: Open Door Detection is off by default. If it is on, Notification warns without pausing; Pause Printing stops the job until you Resume, Stop, or open Check Assistant (door sensor).
- First-layer or spaghetti pause: Micro Lidar first-layer inspection and chamber-camera spaghetti detection can pause the job. Check the part, then Resume or Stop. LED light is required for vision features (FAQ).
- Filament type mismatch on SD/multi-color start: the screen will not let you pick an AMS slot whose type does not match the slice. Load the correct material or re-slice.
Full X1 troubleshooting index: wiki.bambulab.com/en/x1. AMS 2 Pro maintenance: basic maintenance.
Warning
- The hotend (up to 300 °C) and heatbed (up to 110 °C at 220 V / 120 °C at 110 V) can burn. Do not touch them until cool. If you must work near a heated nozzle, the official clog procedure requires heat-insulation gloves (clog check).
- Keep long hair, loose clothing, and jewelry away from moving CoreXY belts, the toolhead, and AMS 2 Pro rollers.
- The X1C is enclosed. Keep the door closed when printing ABS so chamber temperature stays stable. For PLA, TPU, or PETG, the door-sensor wiki says to leave the front door partially open to help avoid heat creep (door sensor).
- The X1C includes an activated carbon filter that scrubs enclosure air before it is exhausted. Official X1C wiki text describes that filter and a 1440-hour (60-day cumulative print) service life; it does not state that the filter replaces room ventilation. If you need ABS/ASA or other high-VOC prints, ask Ryan about shop ventilation before starting (carbon filter).
- The printer has thermal runaway protection (FAQ). If the machine reports a thermal or HMS fault you cannot clear from the wiki, power off if it is safe to do so and contact Ryan.
- AMS 2 Pro drying reaches 65 °C. Do not handle spools until they have cooled. When drying ABS/PETG, remove PLA/TPU first so they do not soften.
Post-Shutdown Checklist
- Part removed; flexible plate flexed off the magnets (avoid bare-hand contact with the print surface).
- Plate returned to the heatbed, seated correctly, or set aside clean if Ryan has a designated storage spot.
- Filament returned to the AMS 2 Pro (use Unload if it was still in the extruder). Leave loaded spools in the AMS 2 Pro unless you were told to swap them; the unit is meant to stay closed and dry.
- Purge bin / box under the rear chute emptied if it is full.
- Front door closed; printer left idle (it will follow its Auto-Sleep setting).
- If you used a shop network, you did not change Wi-Fi or LAN Only settings unless Ryan asked you to.